
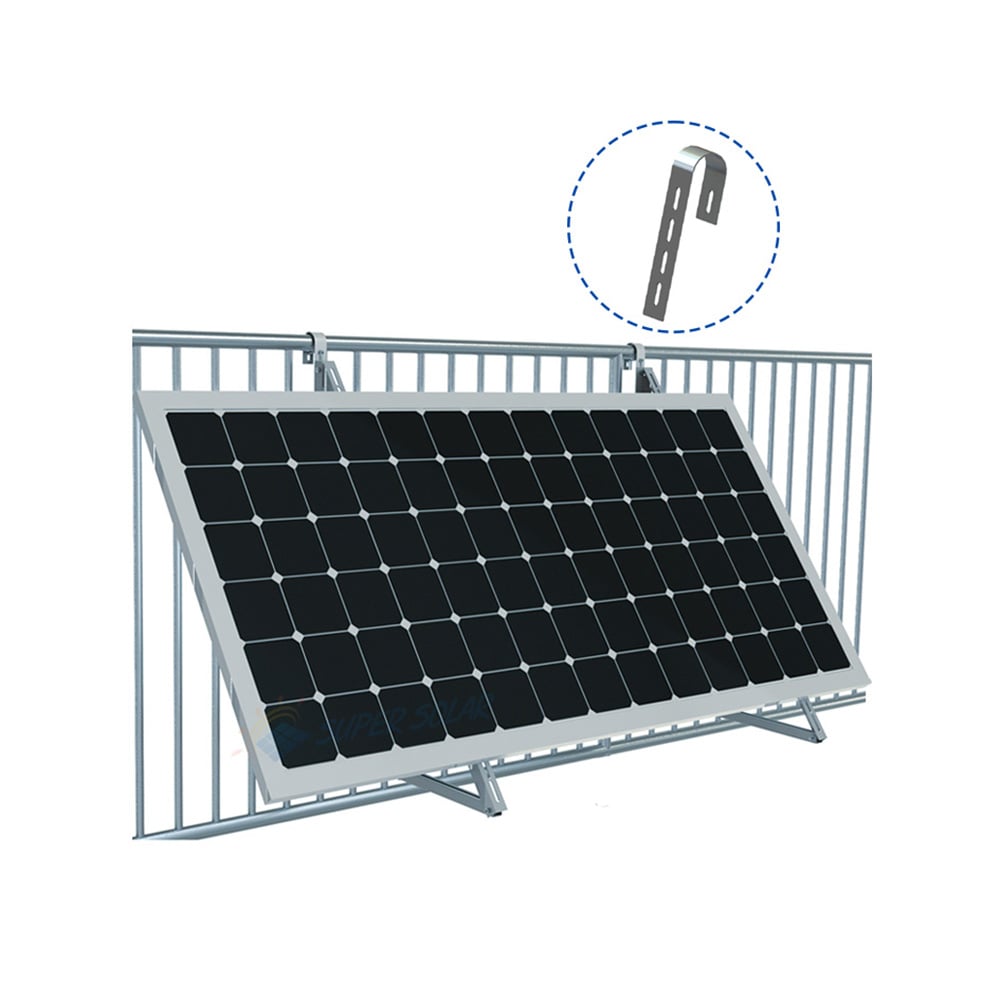

タイル張りの屋根に太陽光発電アレイを設置するには、構造的安定性を確保しつつ、屋根の主機能である雨水の排水機能を維持するための専門的なアプローチが必要です。アスファルトシングルや金属屋根とは異なり、タイルはもろく、荷重を支えることができません。このため、設置用のすべての支持構造は、タイル自体を避けて設置しなければなりません。最も信頼性の高い方法は、高品質な屋根フック式太陽光発電システムを採用し、タイルの下にある木製の垂木(ラフター)に直接固定することです。特定の太陽光発電用屋根フック設置技術を活用することで、設置者はタイル表面から浮かせた状態で確実な固定点を作成でき、ひび割れや雨漏りを防ぐことができます。粘土質タイル、コンクリートタイル、 slate(スレート)のいずれを扱う場合でも、粘土質タイル屋根向けの太陽光発電設置技術の細部を理解することは、長寿命かつ気密・水密性に優れたエネルギー解決策を実現するために不可欠です。
物理的な設置を開始する前に、既存の屋根の状態を把握するための包括的な現地調査が必要です。瓦屋根は他の屋根材と比較して著しく重量が重く、太陽光発電システム(ソーラーアレイ)を追加することで、建物のトラスにかかる死荷重(固定荷重)が増加します。瓦屋根への太陽光パネル設置計画を立てる際には、垂木がパネル、レール、および屋根フック式太陽光発電システムの追加重量を支えられるかどうかを確認しなければなりません。さらに、地中海風S型瓦、平型コンクリート瓦、スペイン式バレル瓦など、使用されている瓦の種類を特定することで、適切な太陽光発電用屋根フック取付金具を選定できます。
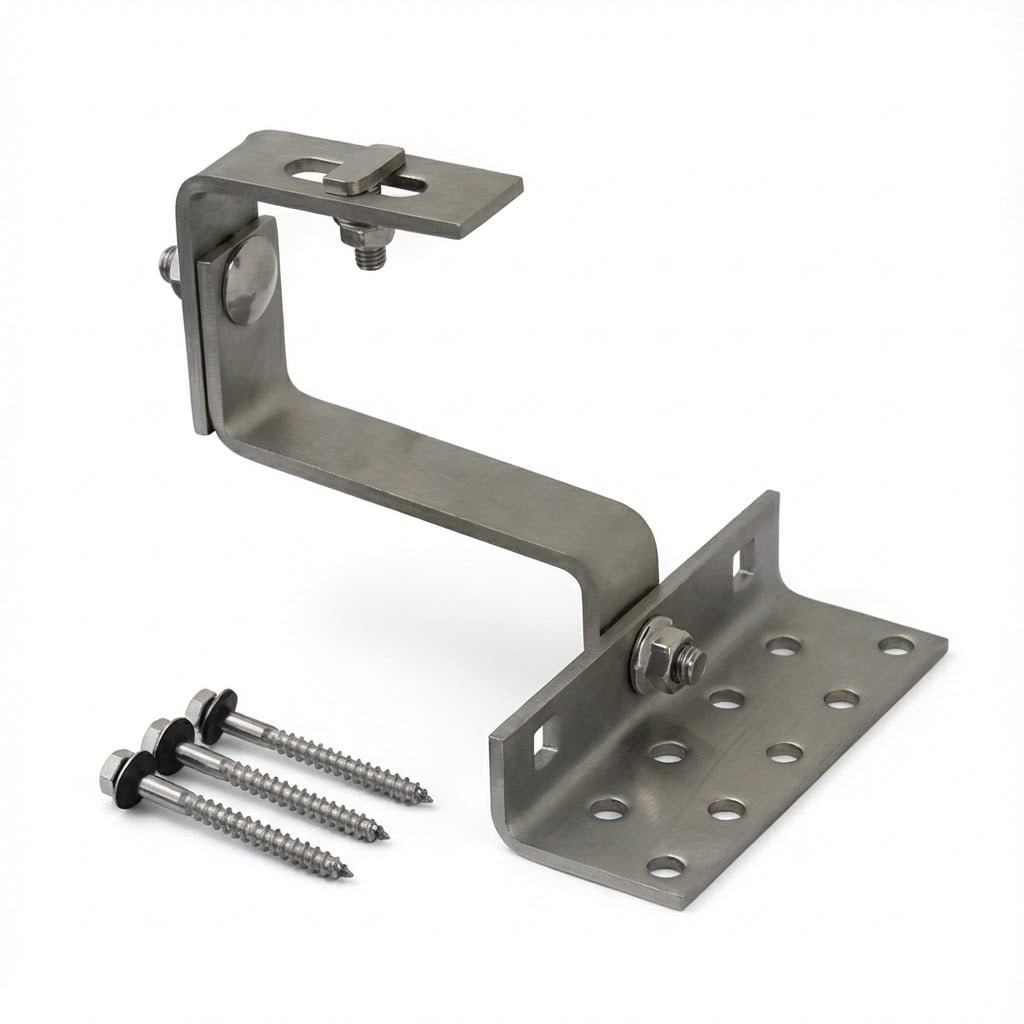
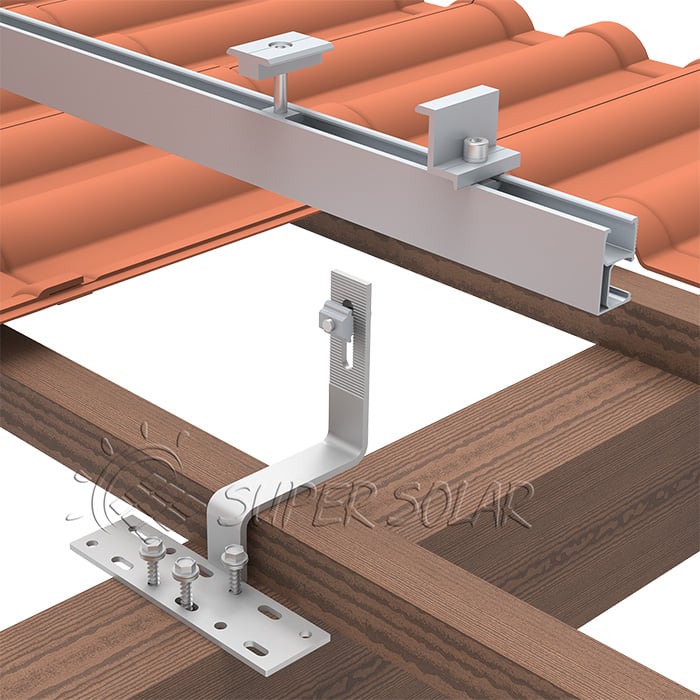
タイルの形状によって、プロジェクトに必要なフックの形状が決まります。例えば、高さのある「S」字型の粘土製タイル屋根への太陽光発電設置では、タイルの曲面を圧迫することなくその上をクリアできるよう、深い「ネック」を持つフックが必要です。一方、フラットなタイルには、下地材(アンダーレイメント)に密着する低プロファイルのフックが必要です。誤ったフックを選択すると、重ね合わせられたタイルが「持ち上がり」、風雨が吹き込む隙間が生じ、屋根裏に雨水が侵入する可能性があります。成功した屋根用フック式太陽光発電システムは、最終的なアレイが水平に設置され、屋根の美観と機能性が維持されるために、この正確な幾何学的適合性に依存しています。
ソーラールーフフックの設置の信頼性は、そのフックがボルトで固定される木材の品質に等しくなります。設置作業に先立ち、施工者は垂木に腐食、水害、または割れなどの兆候がないかを点検しなければなりません。粘土瓦屋根への太陽光発電用マウント設置では、これらの垂木に高強度のラグボルトを打ち込むため、木材は構造的に健全である必要があります。さらに、瓦の下に敷かれる防水シート(ルーフアンダーレイメント)も、優れた状態でなければなりません。この防水シートがもろくなっていたり、破れていたりする場合は、ルーフフック式太陽光発電システムの設置前に修復または交換する必要があります。このような二重の保護アプローチにより、将来的に瓦が破損した場合でも、建物は湿気から守られます。
設置プロセスの核となるのは、建物の骨組みと太陽光用レールとの間に機械的接続を構築することです。これは、一時的に瓦を撤去して野地板(垂木)を露出させることで実現されます。瓦屋根への太陽光パネル設置方法を習得するには、重機械工事と脆い素材に対する繊細な取り扱いのバランスが求められます。各太陽光用ルーフフックの設置位置は、雨水の侵入を確実に防ぐため、慎重に測定し、防水処理(フラッシング)を行う必要があります。体系的な手順に従うことで、粘土瓦屋根向けの太陽光マウント設置は、建物の建築デザインに自然に溶け込むシームレスな延長となります。
プロフェッショナルな屋根フック式太陽光発電システムの設置における最初のステップは、各マウントポイントで瓦を戦略的に撤去することです。施工者は瓦用プライバーを使用して、重なり合う瓦を優しく持ち上げ、対象の垂木(ラフター)を覆っている瓦をスライドさせて外します。垂木の位置を確認した後(スタッドファインダーを使用するか、屋根を軽く叩いて堅い木材の位置を特定する方法が一般的です)、太陽光発電用屋根フックのベースを設置位置に配置します。重い木材が割れるのを防ぐため、ラグボルトを垂木の中央に正確に中心合わせすることが極めて重要です。多くの粘土瓦屋根向け太陽光マウント設計では、頑丈な固定具を滑らかかつ確実に取り付けるために、事前にパイロットホール(下穴)をあけます。
ラフターの準備が完了したら、ステンレス鋼製のラグスクリューを使用してフックを固定します。高品質な屋根用フック式太陽光発電システムには、一体型のフラッシングが備わっているか、または貫通部に「サブフラッシング」を使用する必要があります。この追加の保護層は極めて重要であり、万が一水が瓦の下に侵入した場合でも、ボルトを介してラフター内部へと浸入することを防ぎます。フックの固定後、瓦を加工します——通常はダイヤモンドブレード付きカッターで瓦の下端に小さなノッチを研削することで——フックのアーム上に瓦が平らに収まるようにします。これは、タイル屋根への太陽光パネル設置手順における詳細な工程であり、瓦が元の位置と雨水排水機能を維持することを保証し、「フックリフト」現象を防止します。
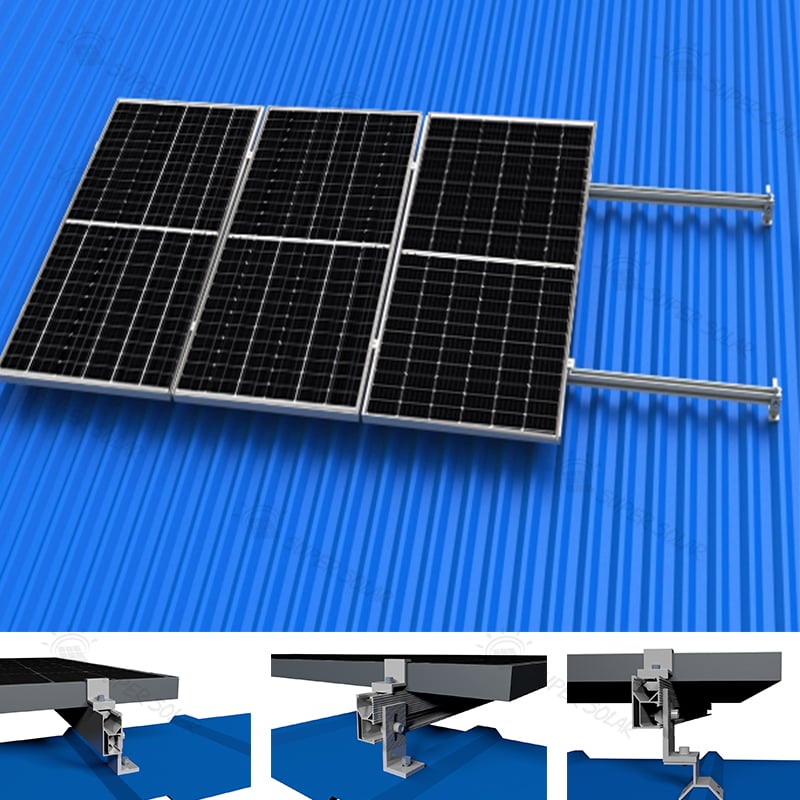
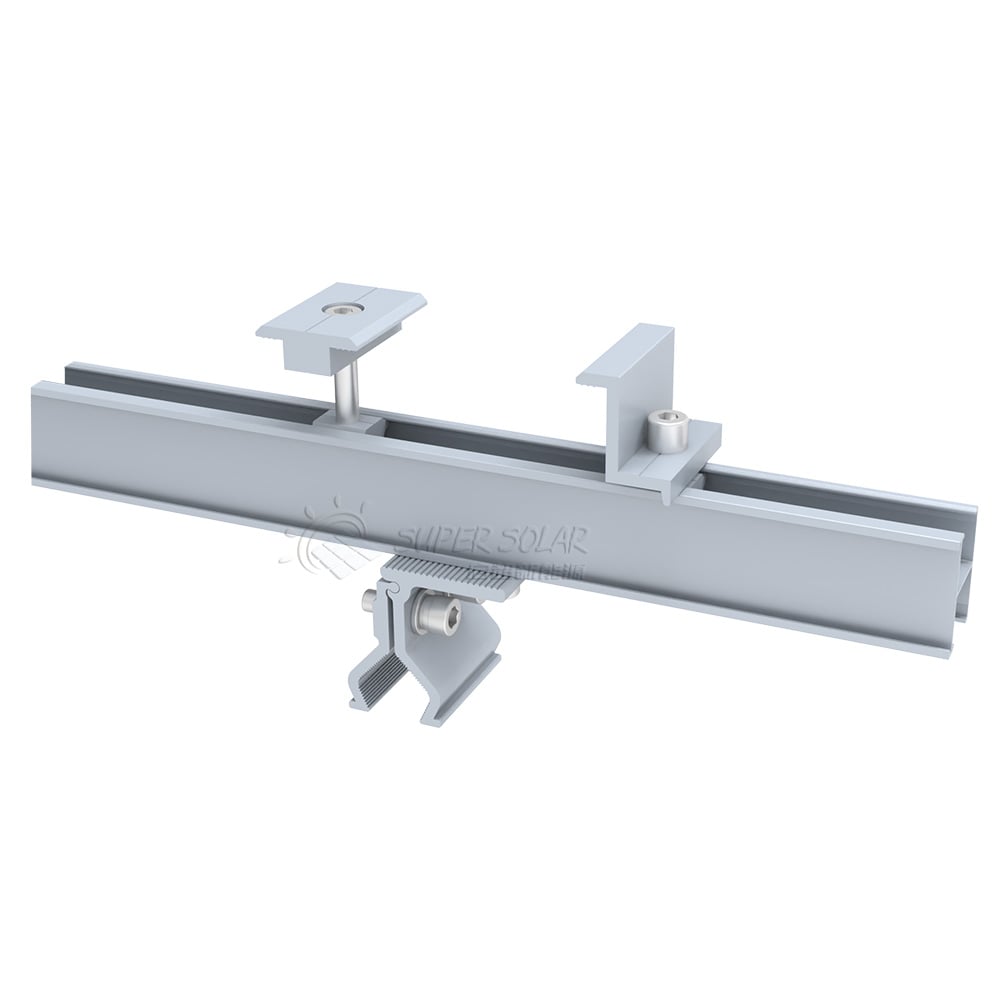
フックを確実に固定し、タイルを再設置した後、システムは屋根面から太陽光発電用の上部構造へと移行します。レールはアレイの骨格であり、太陽光発電モジュールを水平に支持する平面を提供します。堅牢な屋根フック式太陽光発電システムでは、これらのレールは腐食に耐えるため、アルマイト処理されたアルミニウムで製造されます。太陽光発電用屋根フックの設置工程では、これらのレールが十分な高さに設置され、空気の流れ(通気)を確保できるようになっています。これはパネルの冷却に不可欠であり、粘土瓦屋根用の太陽光発電マウント部品の健全性を維持するためにも極めて重要です。
レールはL型金具または専用の取付ボルトを用いてフックに固定されます。屋根全体にわたってレールが完全に直線になるよう、糸で基準線を引く方法(ストリングライン)またはレーザーレベルを使用することが不可欠です。瓦屋根への太陽光発電パネル設置方法を学ぶ際、初心者はしばしばレールの水平調整の重要性を見落とします。古い屋根の自然な凹みや曲線に沿ってレールを設置すると、太陽電池モジュールに応力が加わり、最終的にマイクロクラックが発生する可能性があります。適切に調整された屋根フック式太陽光発電システムは、屋根の不規則な形状を補正し、見た目も美しくプロフェッショナルな平滑な仕上がりを実現するとともに、物件の外観価値(カーブアピール)を高め、発電効率の最大化にも貢献します。
粘土瓦屋根用太陽光発電マウントシステムの最終段階は、太陽光モジュールの設置です。パネルは、ミッドクランプおよびエンドクランプを用いてレールに固定されます。この屋根フック設置工程において、配線管理が重要な課題となります。すべてのDCケーブルは、パネルの下にすっきりと収められ、紫外線(UV)耐性クリップで固定して、瓦に接触しないようにする必要があります。高品質な屋根フック式太陽光発電システムでは、配線が天候や害虫による損傷から保護されます。電気接続が完了し、システムがアースされた後、この設置は、瓦屋根と同等の耐久性を備えた、清潔で高性能なエネルギー源を提供します。
屋根フック式太陽光発電システムを正しく施工した場合、ほとんどメンテナンスを必要としませんが、システムの長寿命を確保するため、定期的な点検を推奨します。太陽光用屋根フックの設置には機械的な貫通作業が伴うため、数年に一度はルーフフラッシングの健全性を確認することが最善の実践です。瓦屋根への太陽光パネル設置を検討する際には、周囲環境も考慮する必要があります。例えば、鳥の活動が活発な地域や落葉が多い地域では、粘土瓦屋根用の太陽光マウント下部の隙間を時折清掃し、湿気を閉じ込める原因となる異物の堆積を防ぐ必要があります。
設置業者の最善の努力にもかかわらず、歩行による荷重や急激な熱膨張によって、屋根瓦が偶然ひび割れを起こすことがあります。モジュラー式ルーフフック太陽光発電システムの大きな利点は、太陽電池アレイ全体を解体することなく、個々の瓦を交換できることです。太陽電池用ルーフフック設置部の下にある瓦が破損した場合、その上に設置されたパネルを一時的に持ち上げ、フックを緩め、新しい瓦を切り欠き加工して差し込むことができます。このような保守性の高さこそが、自宅の屋根を長期的な投資と捉える homeowners の間で、粘土瓦屋根向け太陽光マウントシステムが今なお人気を博している理由です。
機械式のフラッシングは漏水防止の第一の防御手段ですが、タイル屋根への太陽光パネル設置工事においては、高品質な屋根用シーラントを二次的な対策として用いることが一般的です。太陽光パネル用屋根フックの設置部周囲にシーラントを塗布することで、追加の防水保証が得られます。ただし、専門の設置業者は「コーキング」のみに過度に依存することを避けます。信頼性の高い屋根フック式太陽光発電システムは、素材同士の物理的な重ね合わせと、重力による雨水の排出に依拠しています。構造用ファスナー、精密にカットされたタイル、そして高品質なシーラントを組み合わせることで、粘土質タイル屋根向けの太陽光発電マウントシステムは、容易に30年乃至それ以上の耐用年数を実現でき、太陽光パネル自体の寿命と一致します。
太陽光屋根フックの設置が経験豊富な専門家によって正しく行われれば、漏水を引き起こすことはありません。重要なのは、適切なフラッシングとノッチ加工された瓦を用いる屋根フック式太陽光発電システムを使用することです。瓦の正しいオーバーラップを維持し、すべての貫通部を母屋レベルで完全にシールすることで、屋根の防水性能が保たれます。実際、多くの粘土瓦屋根用太陽光マウントシステムは、水密性に関して地域の建築基準を上回るよう設計されており、換気口や煙突などの従来の屋根貫通部よりも安全なソリューションを提供します。
粘土瓦は非常にもろく、設置作業員の体重で簡単にひび割れや破損を起こすことが知られています。瓦屋根への太陽光パネル設置方法を学ぶ際、最も重要な安全および品質上のルールは、「ウォークパッド」を使用するか、瓦の下部で野地板(バッテン)と重なる補強された部分のみを踏むことです。屋根フック式太陽光発電システムの専門設置業者は、作業中に自らの体重を分散させたり、瓦を一時的に撤去して作業通路を作成したりするよう訓練されています。設置後に発生する漏水の主な原因は、瓦のひび割れ・破損であるため、慎重な屋根フック設置プロセスには、施工中に損傷した瓦をすべて交換する最終点検が必ず含まれます。
ほとんどの場合、はい。太陽光発電用ルーフフック設置後にタイルが平らに敷かれるようにするためには、フックの真上に位置するタイルの底部に小さな切り欠きを研削する必要があります。これにより、タイルが持ち上がることを防ぎ、雨水や害虫の侵入を許す隙間が生じるのを防止します。高品質な粘土瓦屋根用太陽光発電マウント金具は、研削量を最小限に抑えるため、可能な限り薄型に設計されていますが、プロフェッショナルグレードのルーフフック式太陽光発電システムを実現するには、正確なフィット感が不可欠です。
最適なフックは、コンクリート瓦の形状によって異なります。平らなコンクリート瓦には、低重心・広ベースのフックが、太陽光発電用屋根マウント設置時に通常推奨されます。湾曲したコンクリート瓦には、高さ調整可能なフックがよく用いられ、屋根マウント用太陽光発電システムにおいて、レールが瓦の頂点から適切な高さで水平に配置されるよう調整します。瓦の形状に関わらず、粘土瓦屋根への太陽光発電用マウントに使用される金具は、長期間にわたって屋根面に錆び跡が生じるのを防ぐため、ステンレス鋼または亜鉛メッキ鋼製である必要があります。
 最新ニュース
2025-11-03
2025-10-22
2025-01-24
2024-06-12
2024-06-12