
Understanding Solar Panel Installation on Metal Roofing
Installing solar mounting systems on corrugated metal roofs requires careful planning, precise execution, and thorough knowledge of both roofing and solar equipment. Metal roofs present unique challenges and opportunities for solar installations, making it essential to understand the specific requirements and best practices before beginning the project. With the right approach, these installations can provide decades of reliable renewable energy while maintaining the roof's structural integrity.
The key to successful installation lies in selecting appropriate solar mounting systems that complement the corrugated metal surface while ensuring a watertight and secure attachment. This comprehensive guide will walk you through the essential steps, components, and considerations for achieving a professional-grade solar installation on metal roofing.
Essential Components and Pre-Installation Planning
Required Equipment and Materials
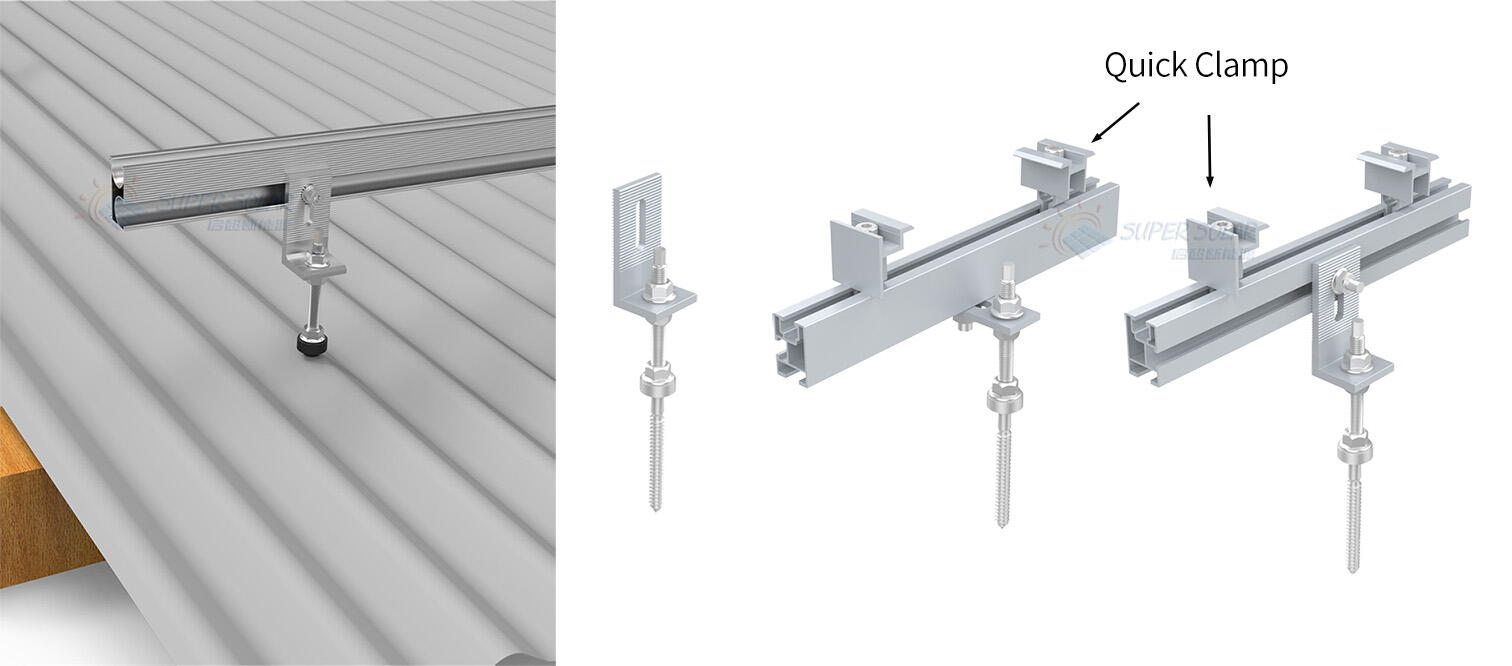
Before beginning the installation process, gathering all necessary components and tools is crucial. The primary components of solar mounting systems include mounting brackets, rails, clamps, and fasteners specifically designed for metal roofs. You'll need L-feet or mounting brackets compatible with corrugated metal profiles, mid and end clamps for securing panels, and high-quality mounting rails that form the foundation of the array.
Additionally, ensure you have proper weatherproofing materials such as EPDM rubber gaskets, butyl tape, and appropriate sealants. These materials are essential for maintaining the roof's water-resistant properties. Don't forget safety equipment, including fall protection gear, heavy-duty gloves, and non-slip footwear suitable for metal roof work.
Site Assessment and Load Calculations
A thorough site assessment is vital for determining the roof's structural capacity and identifying optimal mounting locations. Evaluate the metal roof's condition, age, and structural support system. Calculate the additional load that solar mounting systems will introduce, including both dead loads (permanent weight) and live loads (wind and snow forces).
Document the corrugation pattern and measure the exact dimensions between peaks and valleys. This information is crucial for selecting the right mounting hardware and determining attachment points. Consider local wind and snow load requirements, as these factors significantly impact the number and spacing of mounting points needed.
Installation Process and Best Practices
Locating and Marking Attachment Points
Precise measurement and marking of attachment points form the foundation of a successful installation. Begin by identifying the roof's structural members, typically purlins or rafters, as these provide the strongest attachment points for solar mounting systems. Use chalk lines to ensure straight rail alignment and maintain consistent spacing between mounting points.
When marking attachment locations, consider the panel layout and ensure adequate spacing for maintenance access. Keep in mind that mounting points should align with the corrugation peaks to maintain proper water drainage and prevent potential leaks. Document all measurements and create a detailed installation plan before drilling any holes.
Securing Mounting Hardware
The installation of mounting brackets requires careful attention to maintain the roof's integrity. Start by pre-drilling pilot holes at marked locations, ensuring they align with structural supports. Apply butyl tape or appropriate sealant around each mounting point before installing brackets. Use compatible fasteners with EPDM rubber gaskets to create a watertight seal.
When tightening mounting hardware, follow manufacturer-specified torque settings to prevent over-compression of gaskets or damage to the metal roofing. Install L-feet or mounting brackets perpendicular to the roof surface, using leveling tools to ensure proper alignment. This step is crucial for the overall stability of the solar mounting systems.
Advanced Techniques for Optimal Performance
Rail System Installation and Alignment
Installing the rail system requires precision and attention to detail. Begin by attaching rails to the mounted brackets, ensuring proper alignment and spacing according to the panel manufacturer's specifications. Use a laser level or string line to verify that rails are perfectly straight and parallel to each other.
Consider thermal expansion when installing rails, leaving appropriate gaps between rail sections as recommended by the manufacturer. This prevents stress on the system during temperature fluctuations. Verify that all rail splices and connections are secure and properly aligned to support the weight of the solar panels.
Weatherproofing and Maintenance Considerations
Proper weatherproofing is essential for the longevity of both the solar mounting systems and the metal roof. Apply recommended sealants around all penetrations and verify that rubber gaskets are properly seated. Install additional flashing or weather protection as needed, particularly in areas with severe weather conditions.
Establish a maintenance schedule that includes regular inspections of mounting points, sealants, and hardware tightness. This proactive approach helps identify and address potential issues before they become significant problems. Document all installation details and maintenance procedures for future reference.
Frequently Asked Questions
What type of warranty coverage applies to solar mounting systems on metal roofs?
Most quality solar mounting systems come with a 20-25 year warranty covering manufacturing defects and material integrity. However, proper installation according to manufacturer specifications is crucial for maintaining warranty coverage. Always verify that your installation methods comply with both the mounting system and roof manufacturer's requirements.
How do solar mounting systems impact metal roof drainage?
When properly installed, solar mounting systems should not significantly impact roof drainage. Mounting points are typically positioned on corrugation peaks, allowing water to flow naturally through the valleys. However, it's essential to maintain proper spacing and use appropriate weatherproofing materials to ensure optimal drainage performance.
Can solar mounting systems be installed on all types of corrugated metal roofs?
While solar mounting systems can be installed on most corrugated metal roofs, factors such as roof age, material type, and structural support must be evaluated. Some older or lighter-gauge metal roofs may require additional reinforcement or special mounting solutions. Always conduct a thorough structural assessment before proceeding with installation.
